How to Self-Level a Subfloor Before Flooring Goes Down
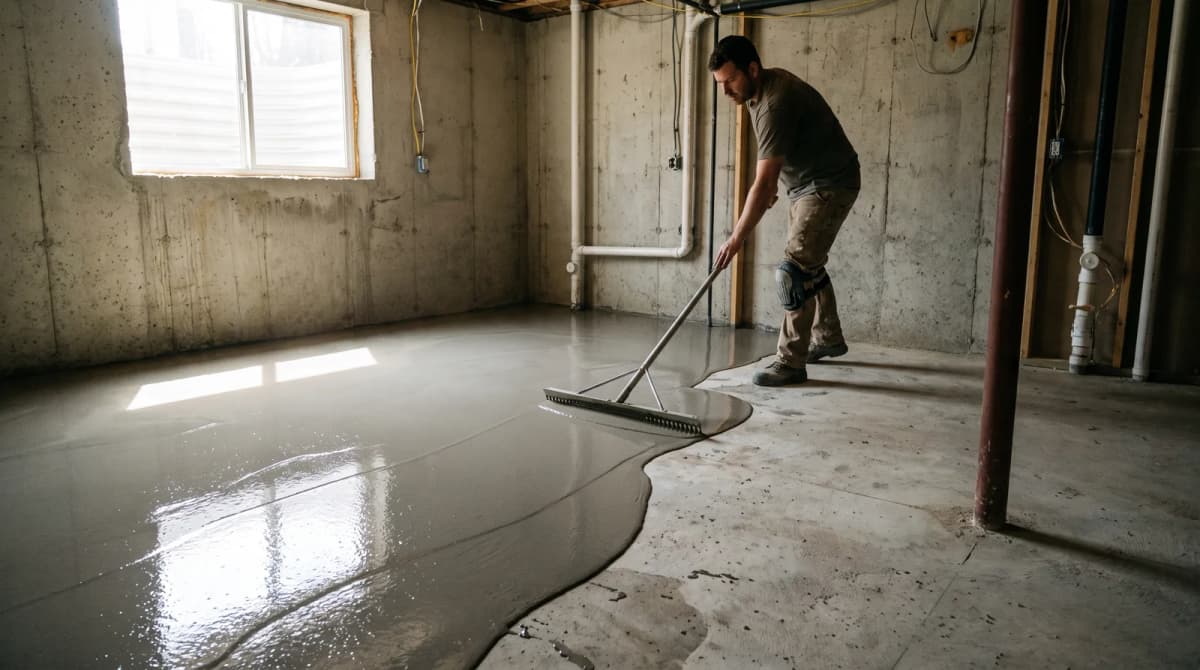
If a straightedge across your subfloor shows more than about 3/16" of dip, you need to self-level before flooring goes down. Floating floors, click vinyl, and laminate all telegraph subfloor irregularities straight through the surface. The right product depends on how big the problem is: a full self-leveling pour for real slope, a skim coat for cosmetic seams, or a patch compound for holes and cracks. Every one of them needs a primed slab first.
How Do You Know If You Actually Need to Self-Level?
Lay a straight 6–10 foot board or a metal straightedge across the floor in a few directions and slide a tape measure or shim underneath at the low points. Most flooring manufacturers' flatness specs sit right around 3/16" over 10 feet, anything worse than that is a real risk for click-lock laminate and vinyl, which need consistent contact to lock properly and avoid gapping over time.
Common culprits in GTA homes: settling in older concrete basements, a slab poured with a slope toward a drain, plywood subfloor seams that were never sanded flush, or a slab that's had multiple flooring layers glued and pulled up over the years, leaving adhesive ridges and low spots behind.
Self-Leveler vs. Skim Coat vs. Patch: Picking the Right Product
These three product categories get confused constantly, and using the wrong one wastes both money and a weekend:
| Product | What it's for | Max pour depth | Price |
|---|---|---|---|
| Ardex K 15 | Premium self-leveler, real slope correction across a room | 1 1/2" neat, up to 5" with aggregate | $130.75/55 lb bag |
| Custom LevelQuik ES | Extended-set self-leveler for larger pours where you need more working time | 1.5" per pour | $48.85/50 lb bag |
| Ardex Feather Finish | Trowel-applied skim coat, feathering seams and low spots to zero | Feather edge to 1/4" | $91.95/10 lb bag |
| Ardex GPS | General patch & skimcoat, holes, cracks, plywood seams, embossing filler | Featheredge up to 1/2" | $62.95/25 lb bag |
If you're correcting real slope across a room, you want K 15 or LevelQuik ES. If you're just knocking down seams and small ridges before laminate or vinyl goes down, Feather Finish or GPS does the job for a fraction of the material cost.
Ardex K 15 vs. Custom LevelQuik ES: Which One?
Both are legitimate self-levelling underlayments and both need water mixed in and a gauge rake to spread. The real difference is working time and typical use case. LevelQuik ES is the "extended setting" formula, giving you more time to work a larger pour before it starts to set, which matters if you're covering a big basement or an open-concept main floor solo. Ardex K 15 has a shorter flow window (about 10 minutes) but is walkable in 2–3 hours and handles a wider depth range, including thick pours with aggregate extension for seriously uneven slabs.
Coverage on both bags works out to roughly 50 sq ft per bag for a standard pour, but actual yield swings hard with depth. The thinner you spread it, the further a bag goes; a deep pour to correct a real slope will eat through bags fast. Budget generously and keep a spare bag on hand rather than running short mid-pour, since you can't easily feather a self-leveler back in once it starts setting.
Tools for a Self-Leveling Pour
Beyond the bagged compound itself, you'll want: a mixing paddle and a heavy-duty drill (self-levelers are thick and will burn out an underpowered drill), a clean 5-gallon pail, a gauge rake to spread the compound to a consistent depth as it flows, and spiked shoes so you can walk across wet compound without leaving footprints. Mixing consistency matters as much as the product choice, too much water weakens the cured strength, too little and it won't flow out properly. Follow the water ratio on the bag exactly rather than eyeballing it.
Common GTA Subfloor Problems That Call for Leveling
Older Markham, Scarborough, and Richmond Hill homes built through the 80s and 90s often have basement slabs poured with a slight slope toward a floor drain, fine for a utility basement, a problem the moment you want to float laminate or vinyl down there. Homes that have had multiple flooring layers glued down and torn back up over the decades frequently carry adhesive ridges and inconsistent patches that read flat to the eye but fail a straightedge test. And plywood subfloors on additions or renovated spaces sometimes have seams that were never sanded flush after the join, small individually, but enough to show through a floating floor as a faint ridge line running across the room.
Do You Need to Prime First? Always.
Every self-leveler and patch compound we stock requires a primer coat before it goes down. Primer controls how fast the concrete pulls moisture out of the wet compound, skip it, and you risk pinholing, cracking, or the leveller simply not bonding to the slab.
- Ardex P 4, rapid-drying, ready to use, dries in about 30 minutes. Good default for most standard concrete. If you're using a moisture-control system like ARDEX MC RAPID, follow that system's own priming requirements instead. They aren't interchangeable with P 4.
- Ardex P 51, a concentrated primer diluted with water, used at a 1:1 ratio on standard absorbent concrete (dry 30 minutes to 24 hours before pouring), or "double-primed" at 3:1 then 1:1 on extremely porous or gypsum substrates.
Both cover roughly 300–400 sq ft per gallon depending on the substrate's absorbency, a porous, dusty old slab will drink up more primer than a dense, newer pour.
How a Self-Leveling Pour Actually Goes
Once the primer has dried and passed a dry-check (per the manufacturer's instructions on the bag), mix the compound to the specified water ratio until it's lump-free, then pour it out starting from the far corner of the room and working back toward the door. Use the gauge rake to help it reach a consistent depth in tighter spots or against walls, but resist the urge to over-work it, self-leveling compounds are formulated to flow out and self-correct on their own, and excessive raking can introduce air and disrupt that process. Work in sections if the room is large enough that one batch won't stay workable across the whole space before it starts to set.
Common Mistakes
- Skipping the primer to save a step, the #1 reason self-levelers crack or lift at the edges.
- Pouring too deep in one lift. Both K 15 and LevelQuik ES have maximum single-pour depths, go past them and you risk shrinkage cracking as it cures.
- Installing flooring too early. A pour that's walkable in a couple of hours isn't necessarily dry enough for wood flooring or moisture-sensitive adhesives, which want a longer cure, check depth and room humidity before committing.
- Using a skim coat where you needed a full pour. Feather Finish and GPS are for cosmetic smoothing, not for correcting a genuine slope. Trying to build up real height with a skim product wastes bags and rarely levels evenly.
What Happens If You Skip This Step?
Installing floating laminate or click vinyl over a slab that hasn't been leveled doesn't just risk cosmetic imperfections. Locking mechanisms rely on planks sitting flat and fully supported across their whole length, a hollow spot under a plank concentrates flex at that joint every time someone walks over it, which is exactly how click-lock joints crack and separate over time. On solid or engineered hardwood installs, an uneven subfloor telegraphs as squeaks or, in worse cases, uneven wear patterns as the floor takes weight unevenly across a room. None of this shows up on day one, it shows up in year two or three, which is why it's worth doing right the first time rather than hoping a floating floor will forgive an unlevel slab.
Products We Stock
- Ardex K 15 Self-Leveling Underlayment (55 lb), $130.75
- Custom LevelQuik ES Self-Leveling Underlayment (50 lb), $48.85
- Ardex Feather Finish (10 lb), $91.95
- Ardex GPS General Patch & Skimcoat (25 lb), $62.95
- Ardex P 51 Primer (1 gal), $124.60, ~400 sq ft coverage
- Ardex P 4 Multipurpose Primer (1 gal), $91.85, ~300 sq ft coverage
Not sure how many bags you need? Use our quantity calculator, or browse the full lineup at Subfloor Prep.
Budgeting for a Whole-Room Pour
For a 300 sq ft basement rec room needing a moderate correction, a realistic materials budget runs 6–8 bags of Ardex K 15 (roughly $780–$1,050) plus 1–2 gallons of Ardex P 51 primer, before flooring goes down on top. That's a meaningful materials cost before a single plank is purchased, which is exactly why it's worth confirming with a straightedge test that you actually need a full self-leveling pour rather than a cheaper skim coat before committing to the bigger spend.
Getting It Right the First Time
Self-leveling is one of those jobs that's easy to explain and genuinely tricky to execute well solo, mixing consistency, working speed, and primer timing all matter more than people expect on their first pour. If your basement or main floor needs real correction before vinyl, laminate, or engineered hardwood goes down, our crews handle subfloor prep as part of every install we quote.
Need a gauge rake, mixing paddle, or heavy-duty drill for the pour? See installer tools. Browse subfloor prep products by category at Subfloor Prep.
Pick up bags and primer at our Markham showroom, or call (647) 428-1111 for a quote.
Your next step
Everything referenced above is in stock or available to order through our installation supplies section, with per-unit coverage listed so you can buy the right quantity the first time. Not sure what your subfloor needs? Call (647) 428-1111 or book a free in-home measurement and we will spec the adhesive, underlay and prep with the floor.
Frequently Asked Questions
How do I know if my subfloor needs self-leveling?
Set a 6 to 10 foot straightedge on the floor in a few directions and check for gaps with a tape measure. Anything more than about 3/16" of dip under a 10-foot straightedge is enough to telegraph through vinyl or laminate, and most manufacturers' flatness tolerances sit right around that number. If you see visible slopes, humps at seams, or low spots that hold water when you mop, it needs levelling before flooring goes down.
What's the difference between a self-leveler, a skim coat, and a patch?
A self-leveler like Ardex K 15 or Custom LevelQuik ES is a pourable compound that flows out on its own to correct larger dips and slopes. A skim coat like Ardex Feather Finish is trowel-applied for feathering seams, small ridges, and cosmetic smoothing, not for correcting real slope. A patch product like Ardex GPS sits in between: it can skim, patch holes and cracks, or act as an embossing filler over old sheet vinyl.
Do I always need to prime before self-leveling?
Yes. Every self-leveler and patch compound we stock requires a primer coat first. Primer controls how fast the concrete pulls moisture out of the pour and gives the compound something to grip. Skipping the primer is one of the most common reasons a self-leveler cracks or delaminates.
How long before I can install flooring over self-leveler?
You can typically walk on Ardex K 15 or LevelQuik ES within a couple of hours, but plan on waiting longer before flooring goes down: most non-moisture-sensitive coverings can go down same day to next day, while wood flooring and high-performance adhesives want a longer cure. Always check depth: a thick pour dries slower than a feather edge, and humidity in the room slows everything down.
Can I pour self-leveler more than once in the same spot?
Yes, but each product has a maximum single-pour depth. Ardex K 15 can go up to 1 1/2" neat (or up to 5" with a pea-gravel aggregate extension), and LevelQuik ES maxes out at 1 1/2" per pour. If your low spot is deeper than that, you'll need multiple lifts, letting each layer set before the next.